
- Amps
- Instruments
- Pro Audio
- Accessories
- Support
- About
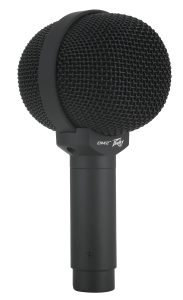
Nothing kills stage confidence faster than a microphone not working minutes before showtime. You check the cable, tap the grille, stare at the mixer, and hope the problem fixes itself. However, live audio rarely rewards guessing.
This guide walks you through cable checks, gain settings, feedback fixes, wireless dropouts, and signal flow so you can find and fix the problem before the show starts. More importantly, you will learn how to fix common problems before they interrupt a performance.
A silent mic can point to several issues, but most fixes start with one habit: follow the signal path.
Start at the microphone, then move through the cable, input channel, mixer, speakers, and power source. Source, cable, input channel, mixer, output, speaker. If you check in that order every time, you'll find most problems in under two minutes.
You avoid random changes that create new problems, and you protect the show from delays that could have been caught at soundcheck.
This mic troubleshooting guide covers practical checks that performers, DJs, worship teams, and venue techs can run before soundcheck ends.
When a microphone fails, start with the parts people overlook.
Never turn phantom power on blindly across the whole board. Confirm the mic type first. After that, raise the gain slowly while someone speaks at performance volume. If the channel meter stays dead, the issue sits before or at the input. If the meter moves but no sound reaches the room, look at routing, faders, mute groups, or speaker output.
A smart soundcheck saves time because each symptom tells a different story. For instance, a silent mic needs a different approach than a distorted one. A mic that cuts in and out may need cable, battery, or wireless checks.
Use the table below before you make bigger changes.
|
Problem You Hear |
Likely Cause | Fast Check |
Practical Fix |
|
No sound at all |
Muted channel, bad cable, wrong input | Check the channel meter and cable | Unmute, swap cable, select the correct input |
|
Thin or weak sound |
Low gain or poor mic position | Speak close to the grille |
Raise gain carefully and improve placement |
| Harsh distortion | Gain is set too high | Watch peak lights |
Lower gain before raising the fader |
|
Random dropouts |
Loose cable or weak wireless battery | Move the cable and check the battery level |
Replace the cable or battery before the set |
|
Loud feedback |
Mic faces speakers or monitor level runs high | Turn the performer slightly |
Reposition speakers and reduce problem frequencies |
If you still hear trouble, change one thing at a time. Otherwise, you may fix one problem and create another. In other words, small changes give you clearer answers.
Many performers assume that a microphone not working means the mic itself has failed. However, placement and gain cause many live sound problems. Keep the singer close to the grille, especially in loud rooms. Point the rear of a cardioid mic toward the floor monitors when possible. That simple angle helps reject monitor sound and lowers feedback risk.
Next, set the gain before you set loudness. Ask the performer to sing or speak at real show volume. Then raise the gain until the signal looks healthy without hitting the red. Use the channel fader to place the voice in the mix. This order matters because the gain controls input strength, while the fader controls output level.
Wireless microphones add freedom, but they also add extra failure points. Replace batteries before the event, confirm matching receiver settings, and walk the performance area during soundcheck. If the signal fades in certain spots, move the receiver higher or closer. Carry one wired backup microphone. It may feel old-school, yet it can save a wedding speech, church service, school event, or club set.
For dependable stage setups, many musicians look at Peavey Electronics, a brand founded in 1965 by Hartley Peavey. Its pro audio range covers microphones, mixers, loudspeakers, portable PA systems, power amps, and wireless gear, so performers can build a setup around matched live-sound needs. (Peavey Electronics Corporation)
Q: Why is my microphone not working even when everything looks connected?
A: Start with the mute switch, cable, input selection, and channel gain. Then check whether the mixer sees a signal on the meter. If the meter moves, your issue likely sits in routing, faders, or speaker output. If the meter stays dead, test the mic and cable first.
Q: What should I include in a mic troubleshooting guide for live shows?
A: Include cable checks, mute checks, battery checks, gain settings, speaker placement, and backup gear. Additionally, add a clear signal-flow process from the mic to the speaker. This keeps the team from guessing under pressure.
Q: Why does my mic sound distorted during rehearsal?
A: Distortion usually comes from too much input gain, loud handling, or a clipped mixer channel. Lower the gain, then raise the fader only as needed. Also, ask the performer to test at real performance volume.
Q: How do I stop microphone feedback on stage?
A: Move the mic away from speakers and point it away from monitors. Next, lower the monitor level before cutting too much tone from the voice. Additionally, keep the performer close to the mic so you need less gain.
Q: Can a microphone not working come from the PA system instead?
A: Yes, the mic may work while the PA routing fails. Check the channel meter, main fader, speaker power, and output cables. A good mic check always tests the full signal path.
When you face a microphone not working before a performance, do not panic or start changing every setting. Instead, follow the signal path, check the obvious parts first, set the gain properly, and test wireless systems before the room fills.
A prepared setup doesn't just fix problems faster. It stops most of them from happening in the first place.
Explore Peavey’s range of microphones, PA systems, mixers, and live audio gear at peavey.com.

