
- Amps
- Instruments
- Pro Audio
- Accessories
- Support
- About
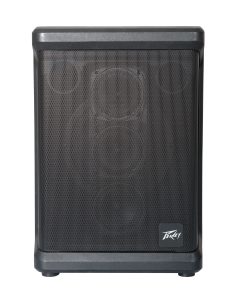
Ever plugged in speakers, microphones, and cables, then wondered why the sound still feels weak or unclear?
Live audio can feel confusing when every knob, input, and cable seems connected to something else.
If you want to learn how to set up PA system gear without second-guessing every step, this blog will help. You will learn what each part does, how signals move, and how to avoid common setup mistakes before your first live event.
A good live sound setup starts before anyone sings, speaks, or plays. First, you need to understand how sound travels from the source to the audience. A microphone captures sound. Then, the mixer shapes that signal. After that, the speaker projects it into the room. Every connection you make either supports that path or interrupts it.
Poor cable choices, wrong input levels, and bad speaker placement can each break the chain independently. This PA system setup guide gives first-time users a clear process, so each piece of gear works with the next one.
Every PA system has a few core parts, even when the setup looks different. Usually, you start with microphones, instruments, or playback devices. These sources feed into a mixer, where you control volume, tone, and signal routing. Next, the mixer sends sound to powered speakers or to an amplifier connected to passive speakers. Additionally, monitors may send sound back to performers on stage.
Before you connect anything, check each device and cable. For example, vocal microphones usually need XLR cables. Keyboards, phones, or media players may need line inputs or adapters. Meanwhile, some microphones require phantom power, especially condenser models. However, dynamic microphones often do not need it.
Also, keep power cables and audio cables organized. This reduces hum, confusion, and tripping risks. More importantly, label inputs when multiple people use the system. Clear labeling helps you fix issues faster during soundcheck. When you understand the role of each component, you control the setup instead of guessing through it.
The order matters because every connection affects the next one. Start with all volume controls down. Then connect microphones and instruments to the mixer. After that, connect the mixer outputs to powered speakers or to an amplifier if you use passive speakers.
Finally, connect the power cables and switch everything on in the correct sequence.
|
Setup Step |
What to Do |
Why It Matters |
|
Connect sources |
Plug microphones and instruments into the mixer |
Keeps every sound source organized |
|
Set mixer levels |
Start low and raise slowly | Prevents sudden noise and distortion |
| Connect speakers | Send mixer output to speakers or amp |
Creates the main sound path |
|
Place speakers |
Aim them toward the audience | Improves clarity and reduces feedback |
| Test each channel | Check one input at a time |
Finds problems before the event starts |
Additionally, always turn speakers on last and off first. This helps prevent loud pops from reaching the speakers. In contrast, powering everything randomly can create noise and stress the system. Therefore, slow setup beats rushed setup every time.
Many first-time users think louder means better. However, live sound works better when you balance gain, channel volume, master volume, and speaker output. Start by asking the speaker or singer to perform at real event volume. Then raise the channel gain until the signal feels strong but clean. Next, bring up the channel fader or knob. Finally, raise the main output.
Speaker placement also plays a major role. Keep microphones behind the front speakers whenever possible. If a microphone points toward a speaker, the system can create feedback. Additionally, avoid placing speakers directly against walls or corners unless the room demands it. Corners can boost low frequencies and make speech sound muddy.
This is where trusted gear and support resources help. Peavey Electronics offers live sound equipment across microphones, loudspeakers, mixers, and portable PA options for musicians, schools, churches, and event teams.
A system that sounds good in one room may sound poor in another. Therefore, always test the room before the event begins. Walk around while someone speaks into the microphone. Listen near the front, middle, back, and sides if speech sounds harsh, lower high frequencies slightly. If vocals sound muddy, reduce some low-mid tone. However, make small changes rather than dramatic ones.
Next, test music playback if the event includes tracks. Music exposes problems that speech may hide. For instance, weak bass, sharp highs, or uneven coverage become easier to hear. Also, check monitor levels carefully. Performers need enough sound to stay confident, but loud monitors can trigger feedback.
If you run PA for repeated events, take notes after each setup. Write down speaker positions, mixer settings, and any problem areas you found. Each future setup will be faster and more consistent.
Q: What equipment do I need for a basic PA system?
A: You usually need microphones, cables, a mixer, speakers, and power access. Some setups also need stands, monitors, and adapters. If you use powered speakers, you may not need a separate amplifier.
Q: How to set up PA system gear for a small event?
A: Place speakers toward the audience and keep microphones behind them. Connect microphones to the mixer, then connect the mixer to the speakers. Start with low volume, test each channel, and adjust slowly.
Q: Why does my PA system create feedback?
A: Feedback happens when a microphone picks up sound from a speaker. Then the system repeats that sound in a loop. Move the microphone, lower the volume, or adjust tone controls to reduce it.
Q: Do I need powered or passive speakers for my first setup?
A: Powered speakers often suit first-time users because they include built-in amplification. Passive speakers can work well, but they need a correctly matched amplifier. Choose based on setup size, budget, and control needs.
Q: Can one mixer handle microphones and music together?
A: Yes, most mixers can handle microphones and music sources together. Use the right input for each source. Then balance each channel so speech and music sound clear without overpowering each other.
Q: What makes a PA system setup guide useful for beginners?
A: It should explain signal flow, connection order, speaker placement, and level setting clearly. It should also help users solve common problems before an event starts. Simple steps matter more than technical language.
Learning how to set up PA system gear becomes much easier when you follow a clear order. Start with the signal path, connect each piece carefully, set levels slowly, and test the room before guests arrive. Additionally, remember that placement and gain control often matter more than raw volume.
With the right approach, first-time users can create cleaner vocals, stronger music playback, and fewer last-minute sound problems.
Ready to build a setup that feels easier to manage?
Explore Peavey’s live sound gear and find equipment that fits your next event, performance, or venue.

